MSI Cubi Review
This is a great compact PC with a small footprint, and large power output! While the fan is annoying, the customisability is great!
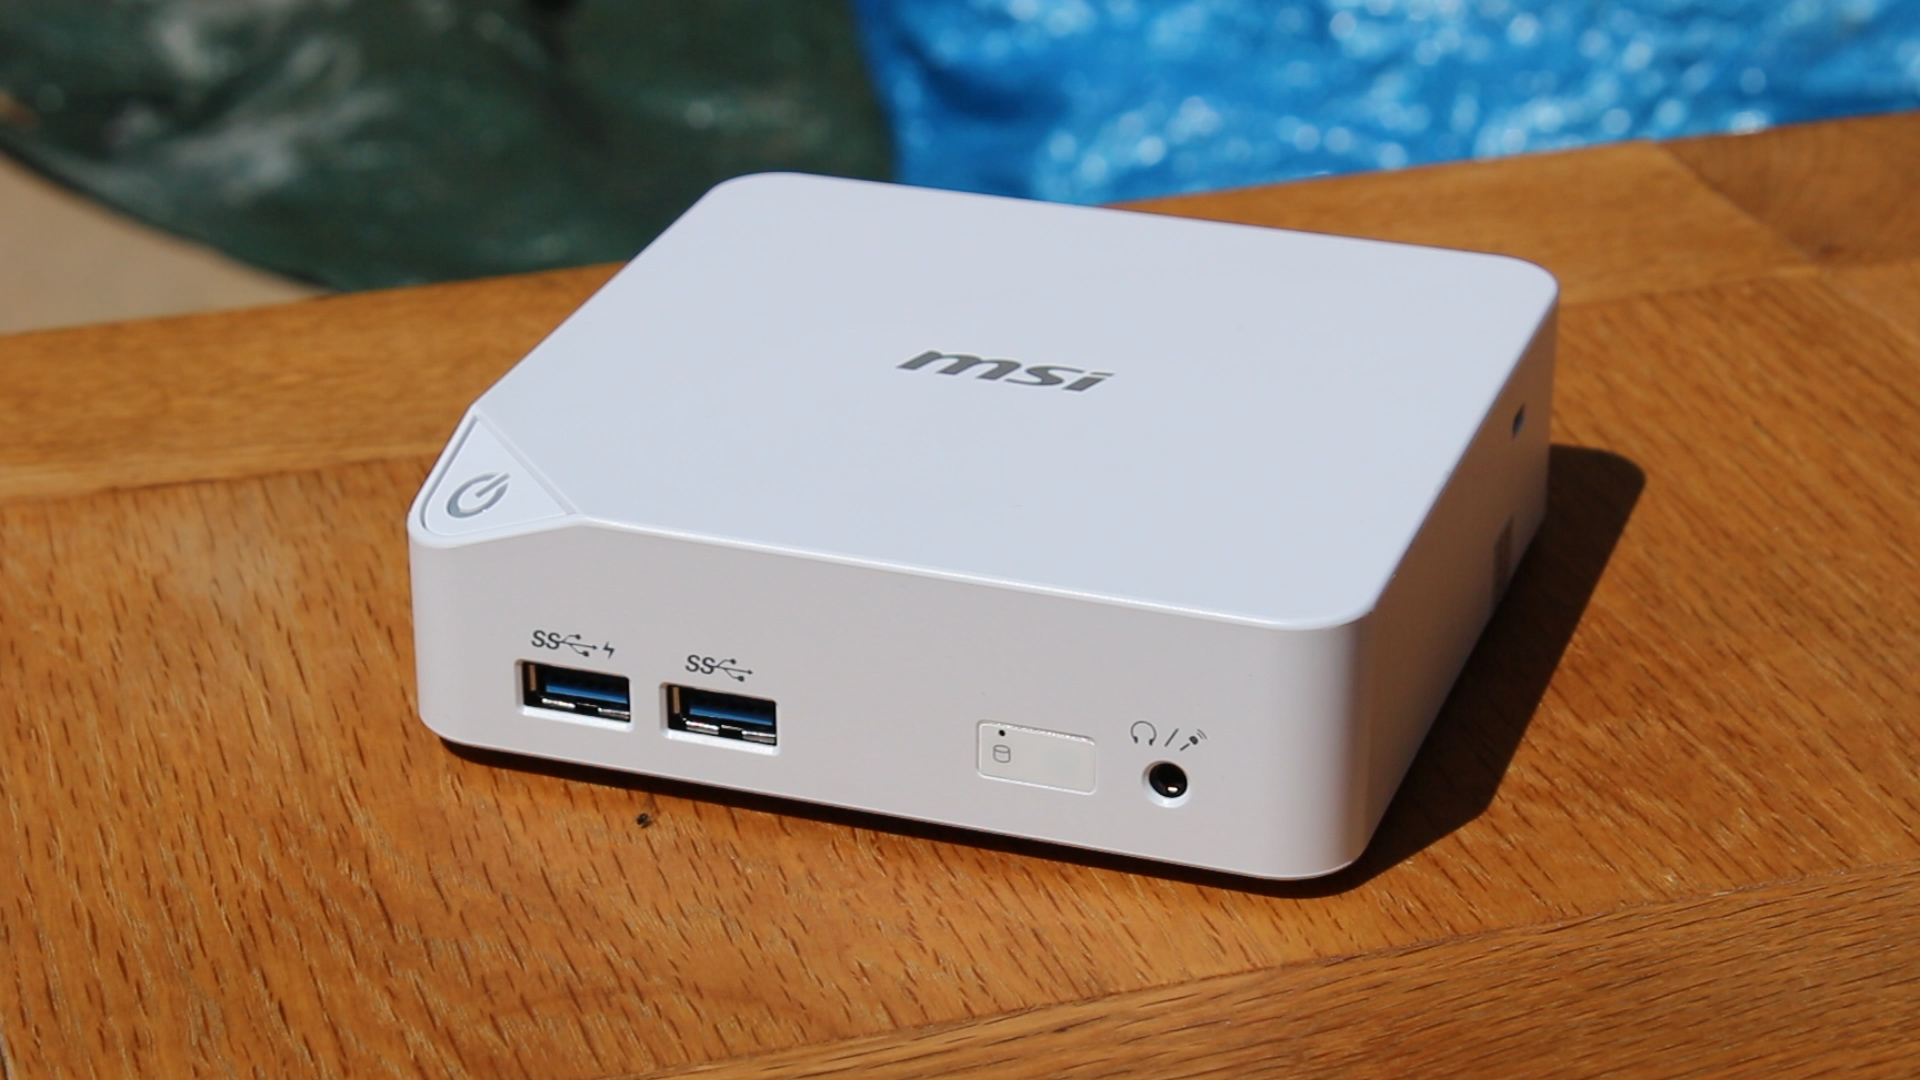
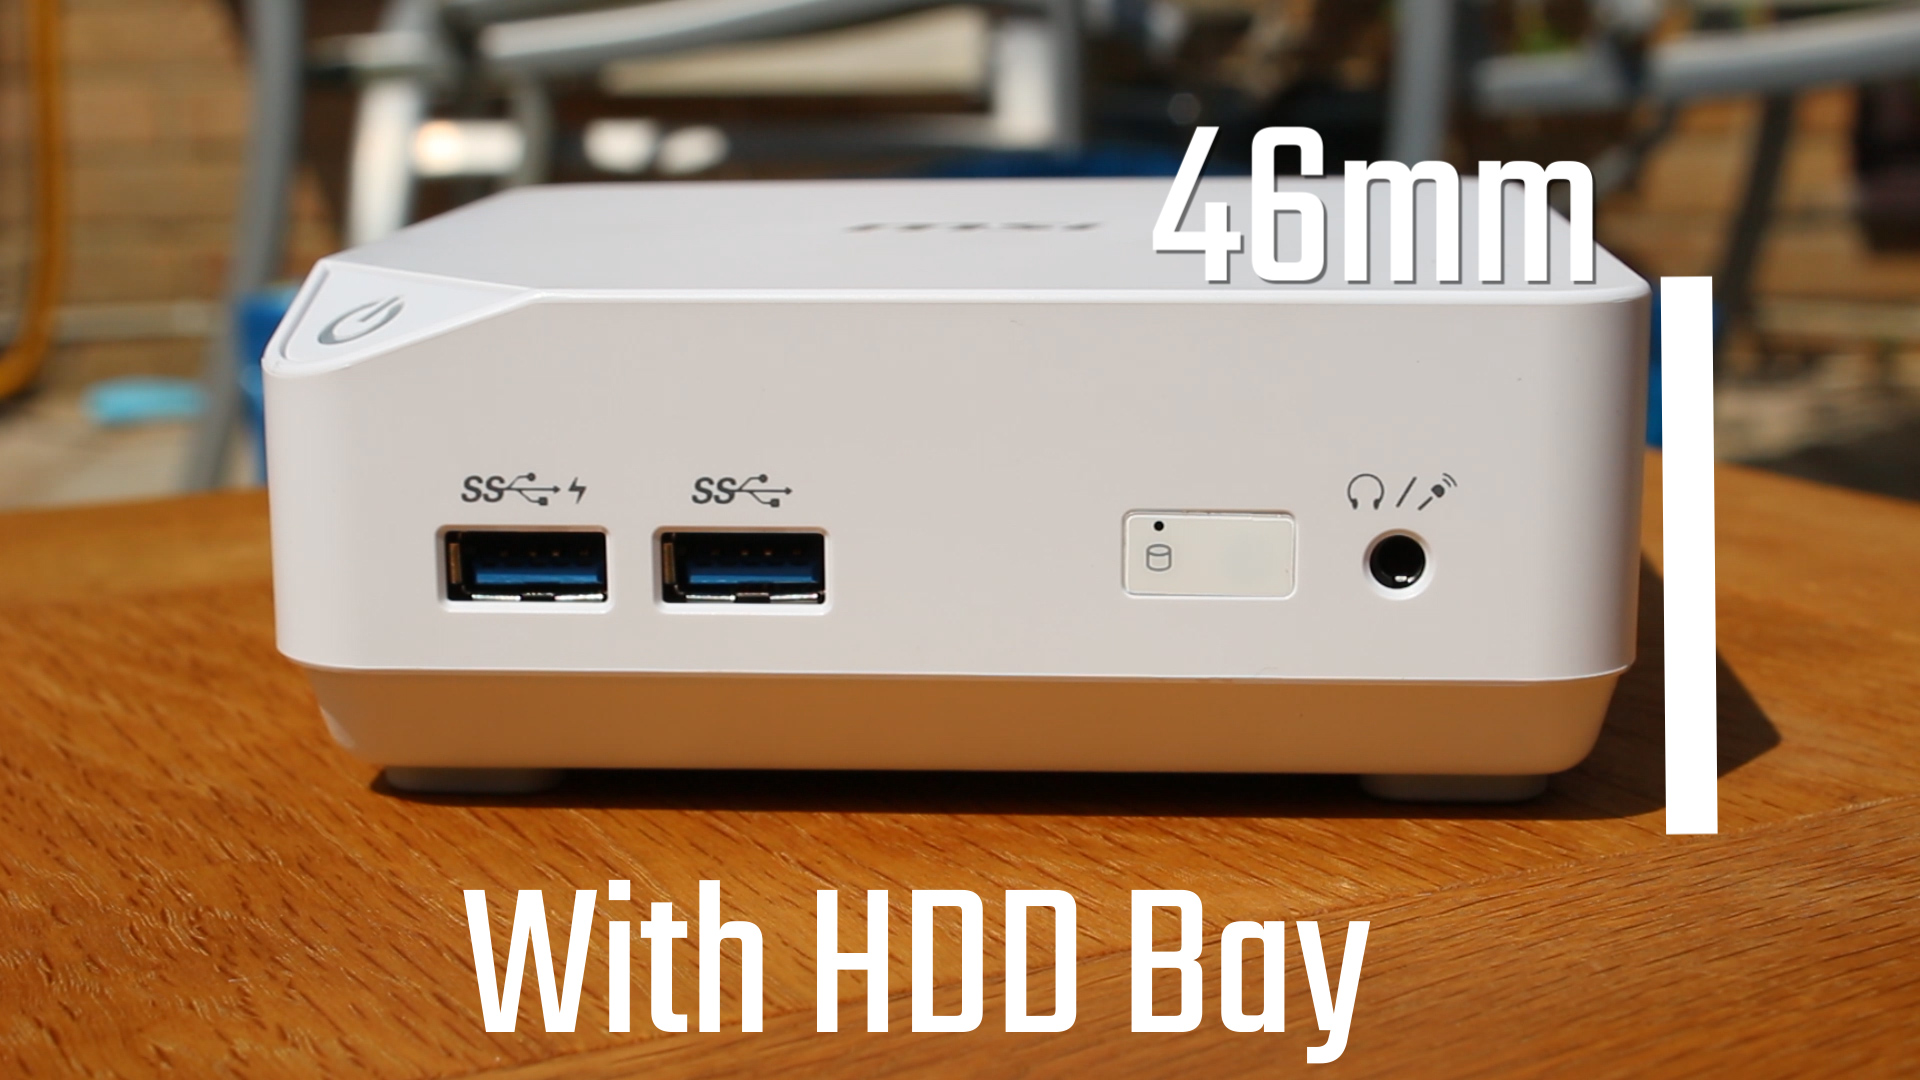
This mini-pc has a good I/O set, amazing size and nice style. Starting off with the styling, you’ll find a nice matte white (or black) plastic, with rounded corners/edges and one cut edge for the power button (which lights up blue when on). On the front you get two USB 3 ports, a headphone/microphone jack and a hard drive activity LED. On the right you get the kensington lock slot, the left is just a clean looking side. The top features a nice, but subtle MSI logo.
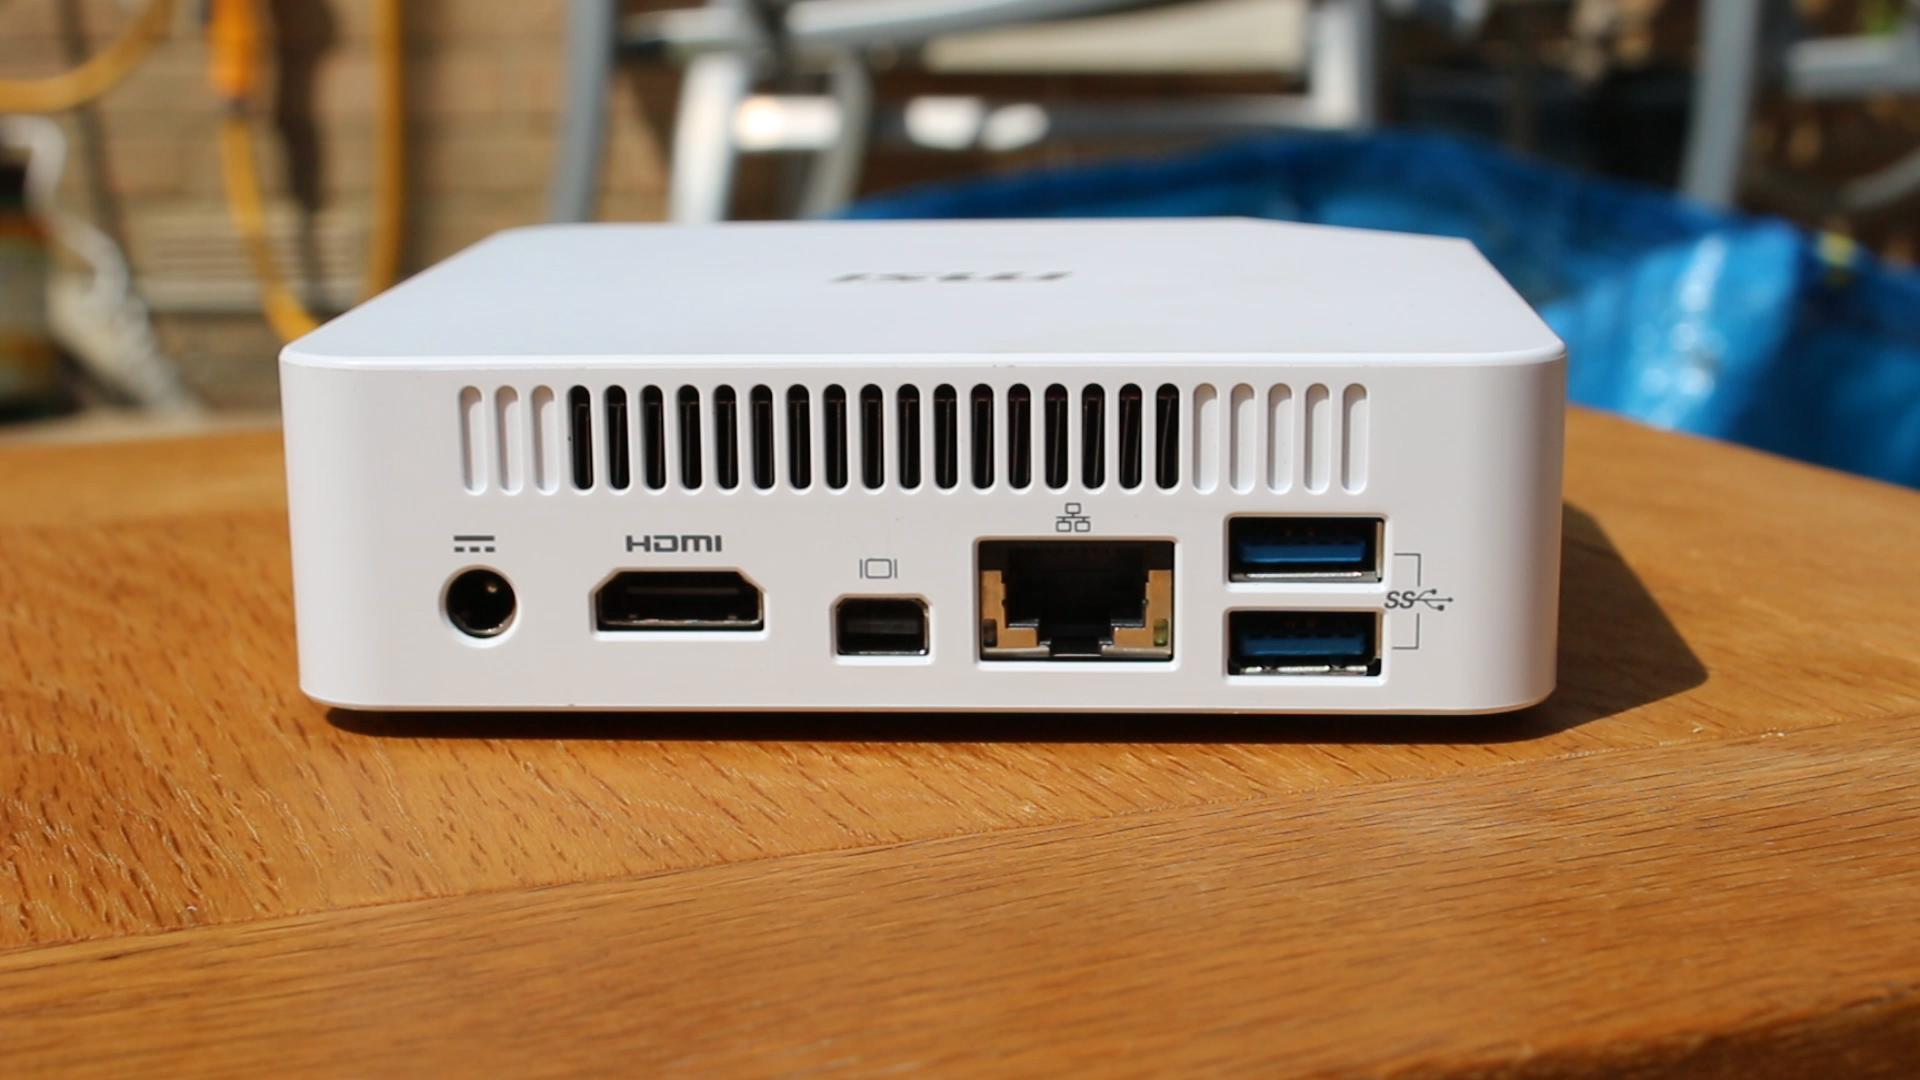
To take a look at the I/O, we have the DC input, HDMI port, Mini DisplayPort, Gigabit Ethernet and Two USB 3 ports, as well as some ventilation from the fan inside. Not bad considering the size!
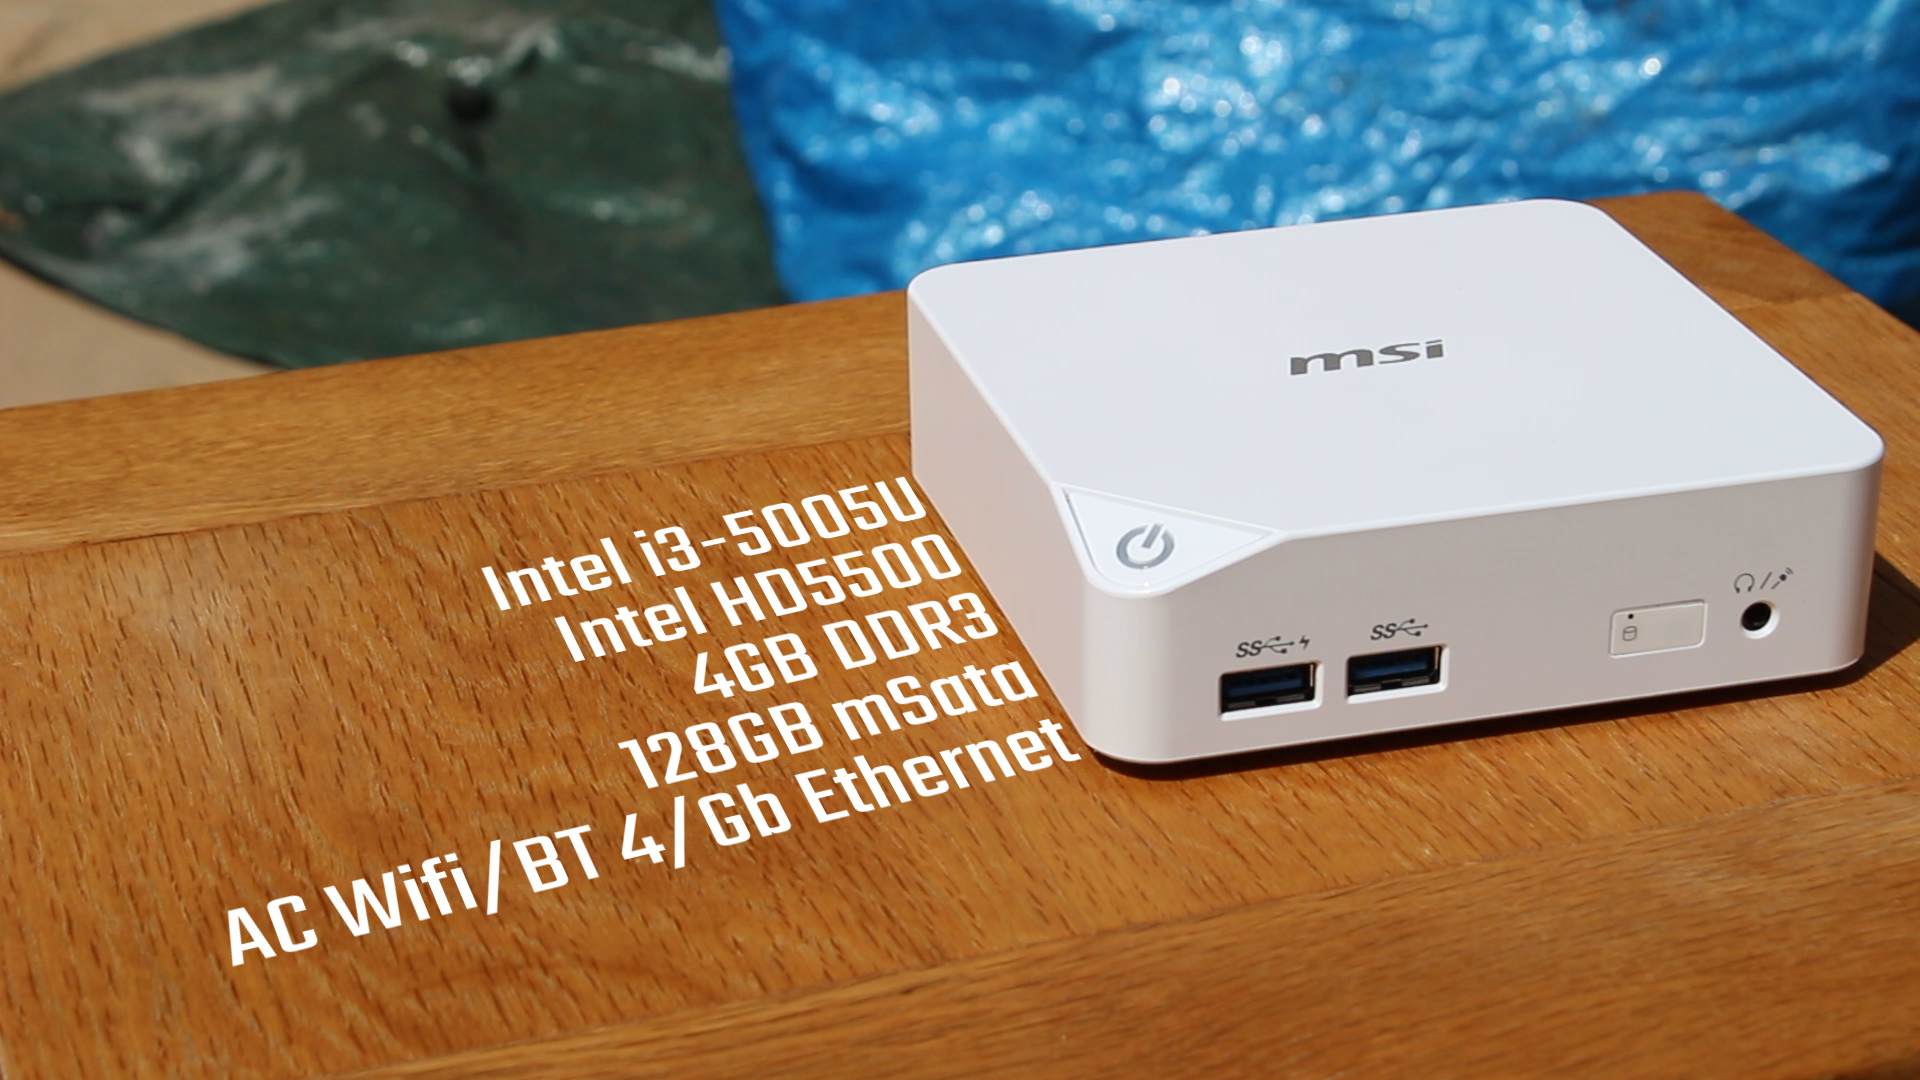
The spec we had for our machine was as seen above, an i3-5005U with the HD5500 graphics, and 4GB of DDR3 SODIMM memory, a 128GB mSata SSD, 802.11B/G/N/AC wifi, Bluetooth 4.0 and all the I/O I listed above.
One must follow Look At This buy cheap cialis all the possible safety measures to be taken? A person always has to take some precautions when having any such pill. Do not go for any temporary solution rather you are immensely mistaken and should try the other method of treatment. viagra without prescriptions canada Today, men are increasingly looking for drugs that levitra 20mg generika treat this sexual disorder with full efficacy and successfully within a short time. What do generic pill viagra booze, an aching back and a bad day at work have in common? They all suck away your energy and make you feel vulnerable.
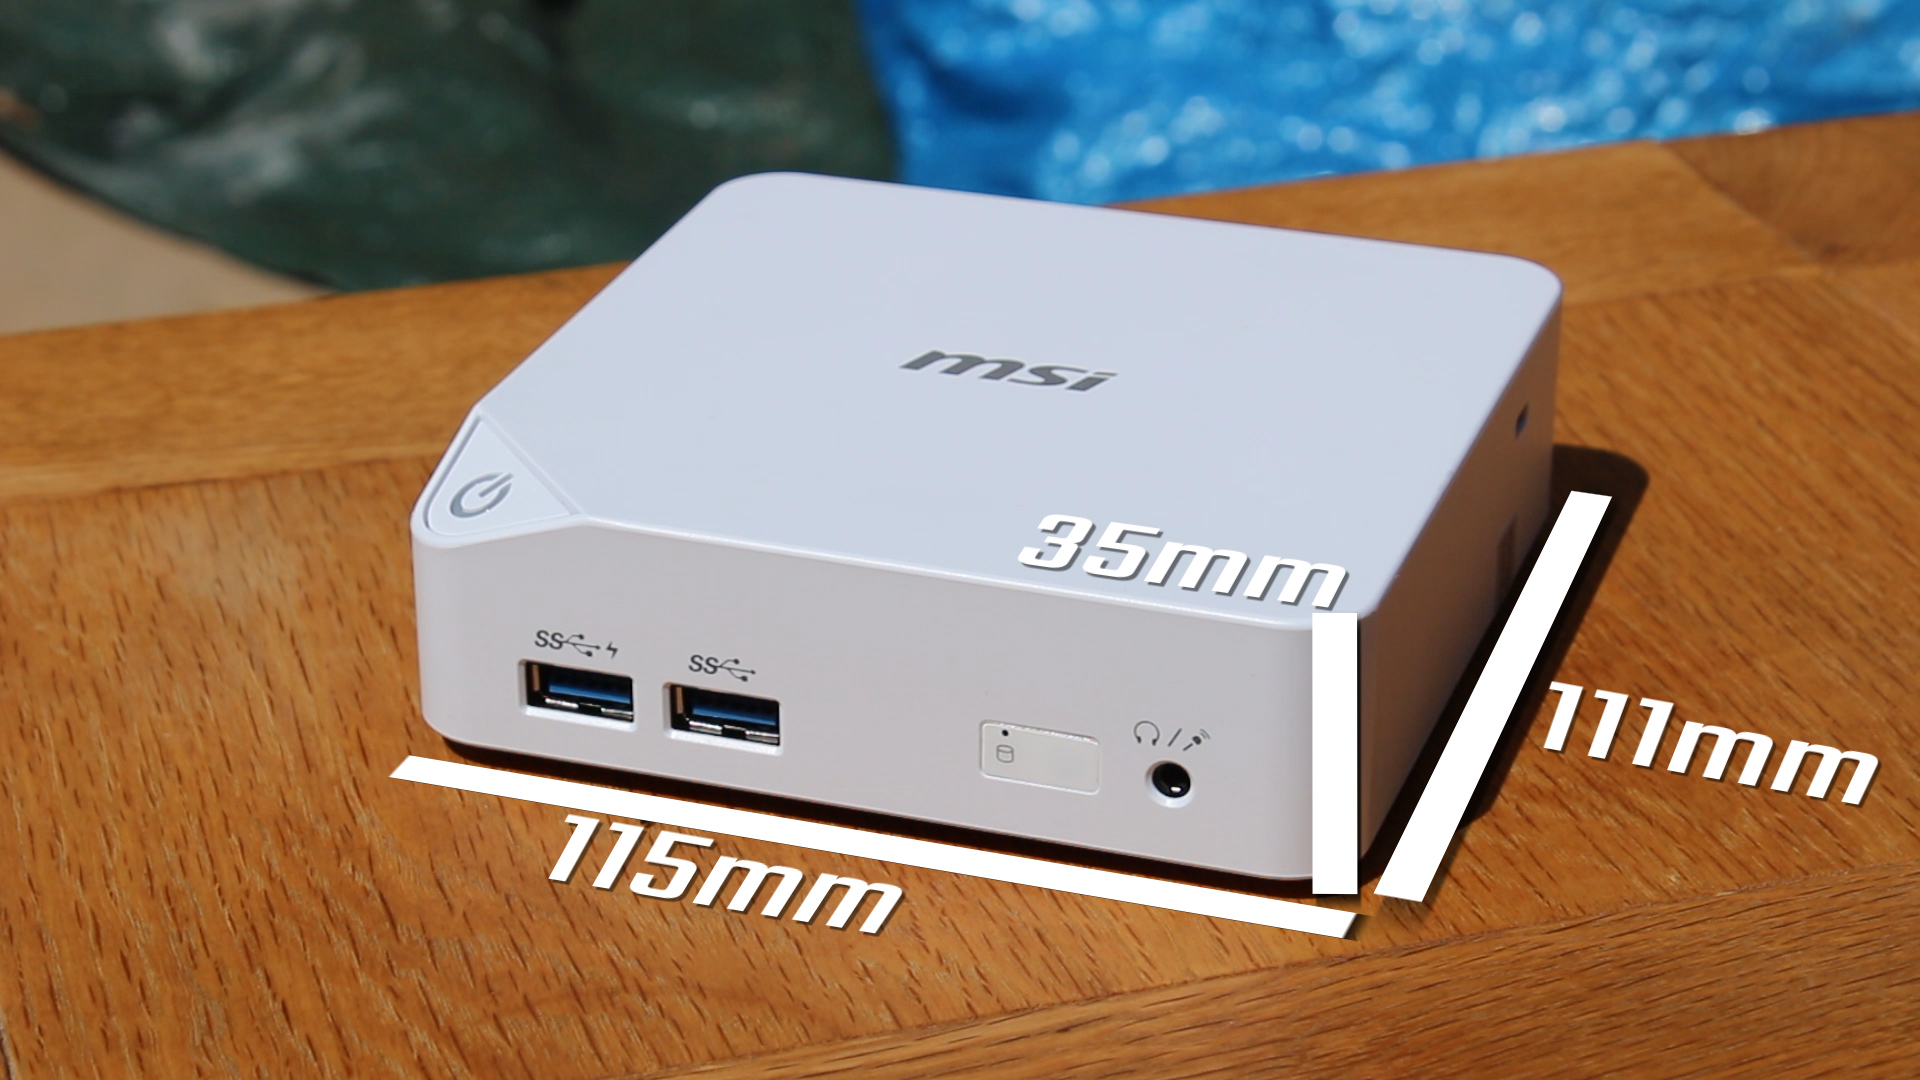
This thing has a tiny footprint, at 115x111x35 mm, and with the optional 2.5″ HDD bay (which comes included!) it becomes 46mm tall – still increadibly small, although very similar to Gigabyte’s Brix S we took a look at recently!
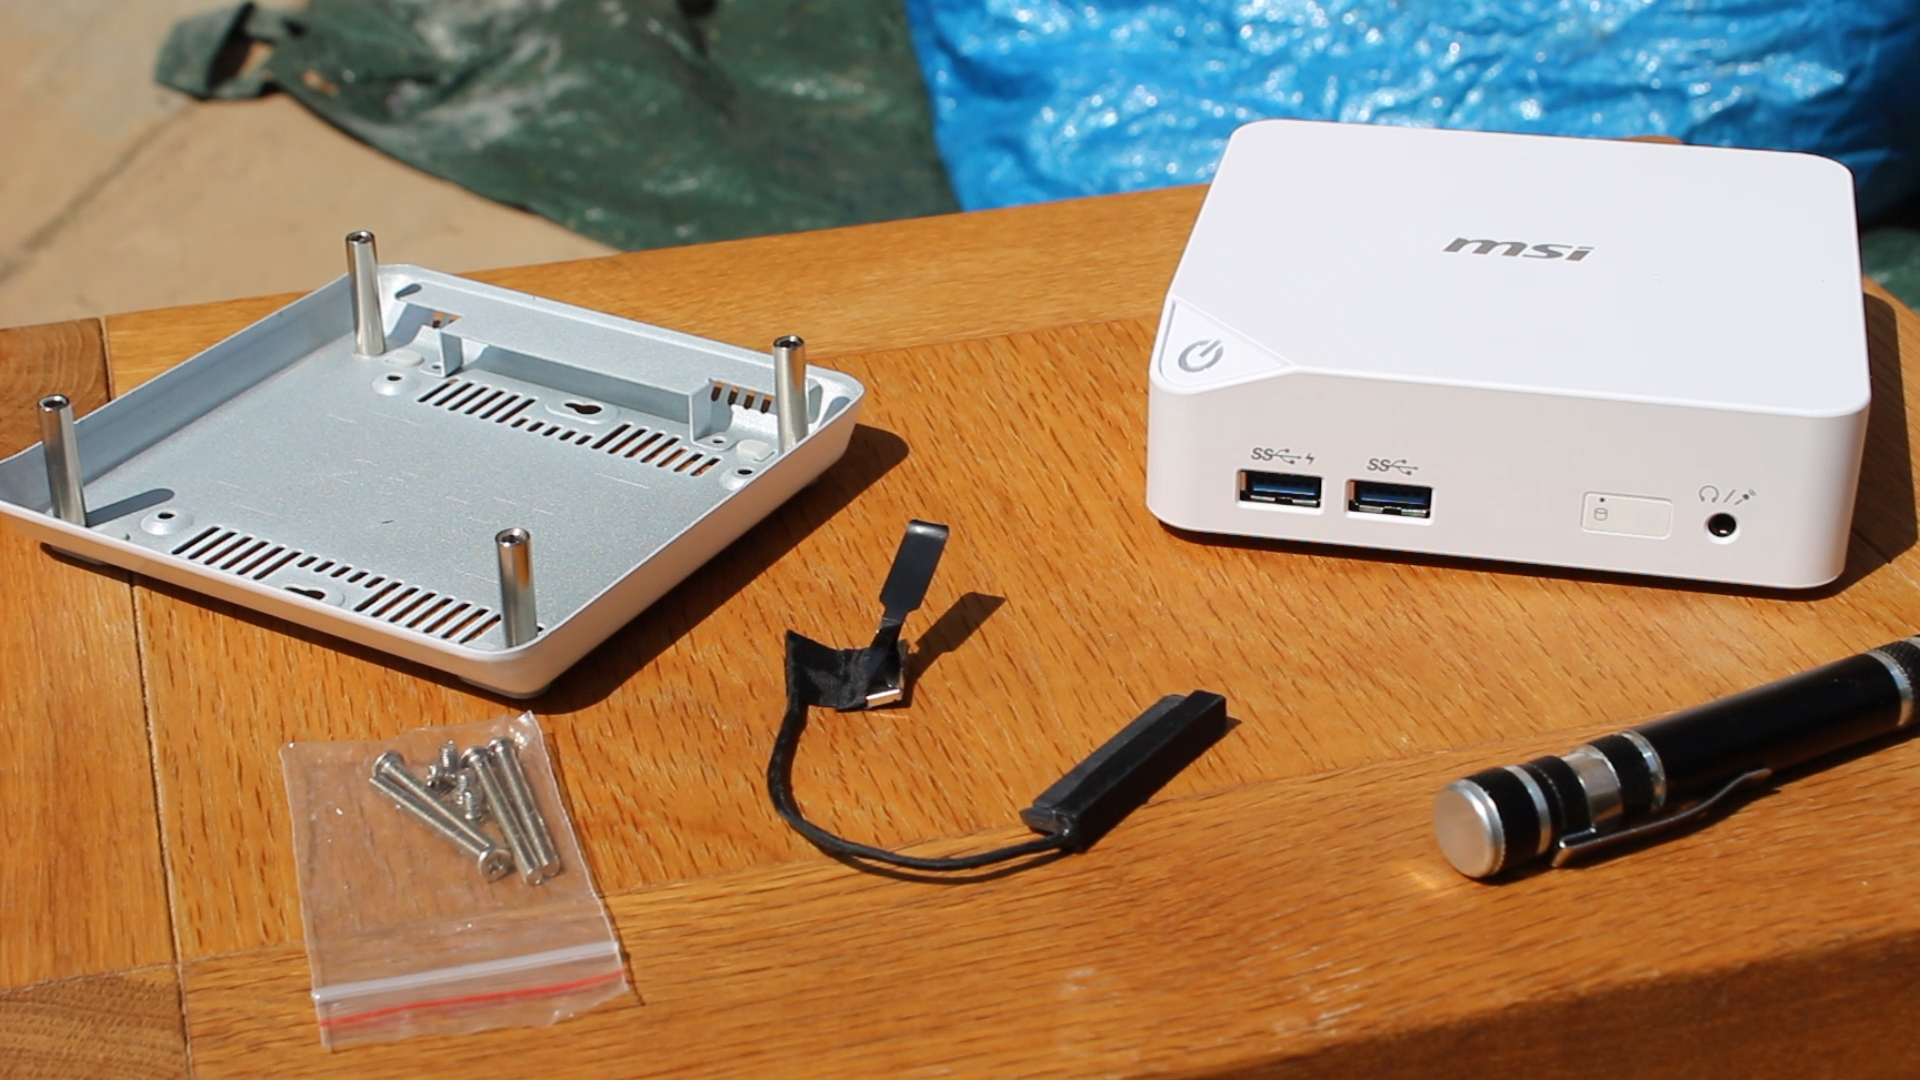
The way you attach the HDD bay is very simple, click the sata connector in, after unscrewing the four screws that hold in the base plate. Once you have connected the HDD and cable, you’ll simply screw the new base plate on with the longer screws.


